
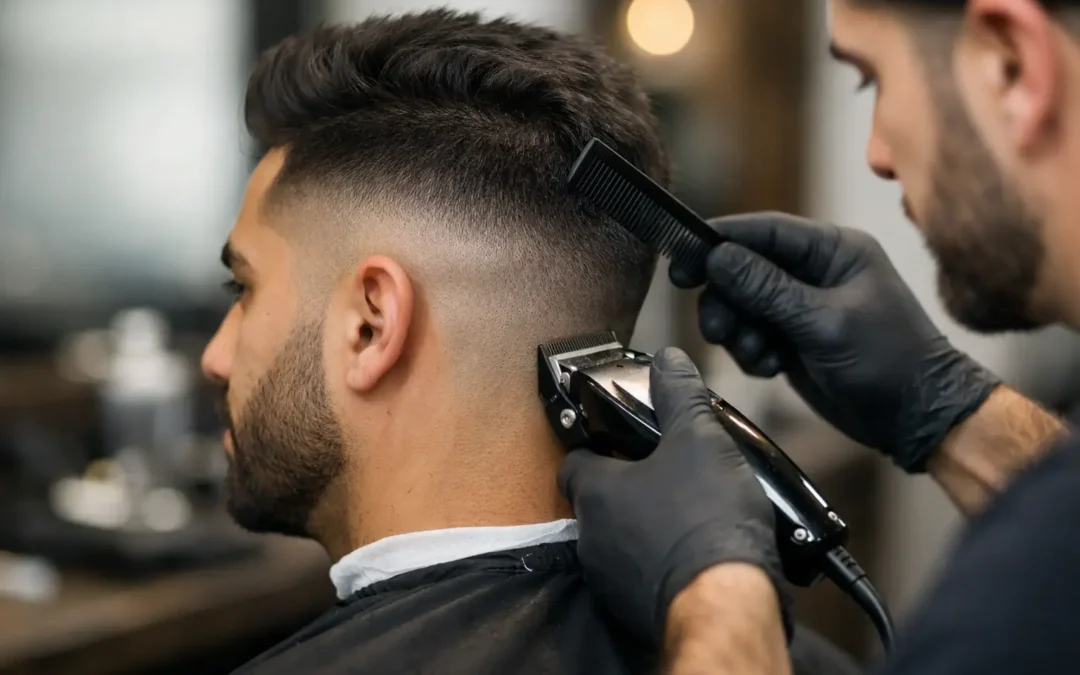
A great fade is not just a short haircut. It is the detail clients notice when they turn their head, check the mirror, and decide whether they will book with you again. Learning how to master barber fades means developing control, consistency, and the confidence to create a clean result on different head shapes, hair textures, and client preferences.
Fades are among the most requested services in modern barbering, but they are also one of the most technical. The difference between a sharp, balanced fade and a patchy one often comes down to the fundamentals: sectioning with purpose, using each tool correctly, and knowing when to stop cutting.
How to Master Barber Fades Starts Before the Clipper
The strongest fades begin with a thorough consultation. Before choosing a guard or setting your first guideline, ask the client what they want to see. Are they asking for a low, mid, or high fade? Do they want skin exposure at the base, or a softer shadow fade? How much length do they want left on top, and how do they normally style it?
This conversation helps you set realistic expectations. A high skin fade may look striking on one client but feel too exposed on someone with a low hairline, scalp sensitivity, or a head shape they prefer to soften. A low taper can be a better choice for a professional client who wants a polished look without dramatic contrast.
Study the client from every angle before you begin. Look for cowlicks, uneven growth patterns, scars, dips in the skull, and areas where the hair is naturally denser or thinner. These details affect where you place your guidelines and how you blend them. A fade should complement the individual, not force every client into the same formula.
Build a Clean Foundation
A fade works because it moves gradually from shorter hair to longer hair. That transition only looks smooth when your foundation is organized. Start with clean, dry hair whenever possible, since wet hair can hide density and make it harder to see your blend clearly.
Choose the fade placement based on the consultation. A low fade begins close to the ear and nape, usually staying below the temple area. A mid fade sits around the midpoint of the head, while a high fade rises closer to the parietal ridge. The parietal ridge is the point where the head begins to curve toward the top. Respecting that shape helps preserve weight where it is needed.
Create your first guideline with a steady hand and a clear plan. Keep it even on both sides, but do not rely only on a mirror view from the front. Step back often, look at the profile, and compare each side from behind. Symmetry is easier to maintain as you work than to repair at the end.
For a skin fade, your first guideline may be created with a trimmer or shaver. For a softer fade, begin with a clipper set to the appropriate length. The tool matters, but technique matters more. Pressing too hard can create harsh lines or irritation. Use light, controlled movements and let the blade do the work.
Learn the Guard System, Then Learn to Adjust It
Guards provide a starting point, not a guarantee. A number 0.5, number 1, or number 2 guard will behave differently depending on hair texture, clipper blade position, and the pressure you use. That is why future barbers need to understand the purpose of each length rather than simply memorizing a sequence.
Most fades are built by moving from the shortest area upward in deliberate steps. After setting a guideline, use the next length to create a new zone above it. Keep each section narrow enough that you can blend it out without pushing the fade too high. When sections become too wide, dark spots and visible shelves are harder to remove.
The clipper lever is one of your most valuable blending tools. Opening and closing the lever changes the cutting length in small increments, allowing you to soften lines between guard lengths. Instead of jumping from one guard to the next and hoping the transition disappears, use lever positions to work gradually through the blend.
Hair texture changes the approach. Coarse, tightly curled hair can show dark spots quickly and may require more detailed clipper-over-comb work. Straight, fine hair may reveal every imperfect line, so light strokes and frequent visual checks are essential. There is no single guard routine that produces the right fade for every client.
Use the Right Motion for a Softer Blend
Good fades are built with movement, not force. The most useful motion is the flick-out technique: begin with the clipper flat against the head, then lift away as you move upward. This prevents you from carving a new line into the haircut.
Work in small sections and use the corner of the blade when targeting darker areas. The full blade removes more hair, while the corner gives you precision. If you see one small shadow, avoid repeatedly going over the entire side of the head. Address the specific area with controlled strokes, then step back and reassess.
Clipper-over-comb is equally important when blending from the fade into longer hair on top. Hold the comb at an angle that follows the head shape, then use the clipper to remove the hair extending beyond the comb. This technique creates a softer, more customized transition than relying on guards alone.
A common beginner mistake is chasing every dark area immediately. Sometimes what looks like a line is simply the way the hair lies. Brush or comb the hair in different directions before cutting more. Remove too much, and the fade can become overly light, uneven, or disconnected from the top.
Detail the Edges Without Overdoing Them
Once the blend is balanced, refine the neckline, around the ears, and the front hairline. A clean edge can elevate the entire service, but sharp does not have to mean heavily altered. Follow the client’s natural hairline whenever possible.
Pushing a lineup back may create a crisp result for the moment, but it can cause problems as the hair grows in. Be especially careful with clients who have receding corners, fine temple hair, or irregular growth patterns. Professional barbering is about delivering a look that grows out well, not just one that photographs well right after the appointment.
Finish with a final visual check under strong lighting. Look for dark bands, uneven height, bulk behind the ear, and weight at the occipital bone. Ask the client to sit naturally and view the result from multiple angles. A fade can look perfect with the head tilted forward but reveal an imbalance when the client stands up.
Practice With Purpose, Not Just Repetition
Skill grows fastest when practice has a clear goal. Rather than attempting a different style every time, focus on one area of improvement. You might spend a week working on low-fade guideline placement, then concentrate on removing the number 1 line with lever control. Photograph your work consistently so you can recognize progress and spot patterns in your technique.
Hands-on education makes this process more effective because instructors can identify the reason behind a problem. A visible line may come from your guard choice, but it may also come from body position, clipper angle, inconsistent tension, or moving too quickly. Immediate feedback helps turn mistakes into repeatable lessons.
At The Beauty Academy, aspiring barbers build their skills through practical training, modern techniques, and guided experience that reflects real client expectations. Working with experienced instructors and practicing in a structured environment can help you develop the technical judgment that separates a basic cut from a dependable professional service.
Turn Technical Skill Into Client Confidence
A client may not know the name of every guard or blending technique, but they will recognize attention to detail. Communicate throughout the service. Confirm the fade height before you commit, explain any adjustment you recommend, and invite feedback before final detailing. This creates trust while showing that you are focused on the client’s goals.
Keep your station organized, clean your tools, and maintain your clippers. Dull blades, poorly adjusted trimmers, and inconsistent sanitation practices can affect both the finish and the client experience. Technical skill and professional habits grow together.
The best fades are not rushed, copied, or created by luck. They come from deliberate practice, trained observation, and the willingness to refine one small detail at a time. With every client, you have another opportunity to build the skill and confidence that can carry your barbering career forward.